|
RAM Charger 8 Installer
Since we get very few reports of problems with our RAM
Charger 8 installer, our first suggestions must be that you
may have a damaged installer, that your disk is damaged, or
that a file previously installed by RAM Charger is so
damaged it can't be properly replaced by the installer.
To verify that none of these is the problem, we recommend
the following steps which should eliminate rare difficulties
that may exist:
- Run a disk check utility - Disk First Aid, or a third
party product like Norton Utility.
- Download a fresh copy of our installer from
http://www.RAMCharger.com/download/info.
- If you have previously installed RAM Charger, then
drag your RAM Charger Preferences to the desktop for
backup - to be restored when everything else is working
fine.
- Run our Installer and "custom" de-install RAM
Charger, removing all components.
- Quit the installer, and empty the trash.
- Do a File Find for "RAM Charger" and "More About" to
be absolutely sure that the only file left is the RAM
Charger Preferences on your desktop.
- Restart with the shift key, and run the installation
providing your license - or as a demo.
- Upon restart, restore your RAM Charger Preferences
(if previously saved) from the desktop by dragging it
back into the preferences folder.
If this does not solve your problems, please contact
RAMCharger (at) RAMCharger.com.
RAM Charger 3.0.1 Installer

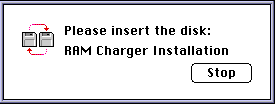
The most common pre-RAM Charger 8 insaller problem is the
message "Please insert the disk : RAM Charger Installation".
If you are not running the installer from a floppy disk
(which is to say it has been downloaded onto your hard
disk), then this message is misleading since a "disk" is not
required.
In this case, there is the remote possibility that you
have a damaged copy our installer and will have to
re-download from
http://www.RAMCharger.com/download/info.
However, it may just be the naming of your folders.
Unfortunately the Apple installer is quite intolerant (we
only use it so that it will be familiar to users, however it
is not very good). You must be sure to have only one folder
named "RAM Charger Installation". Inside this folder (safest
just to put it on the desktop) should be the "Installer" and
"No User Serviceable Parts Inside". If your first folder is
not named "RAM Charger Installation" you must re-name it, or
if you have "RAM Charger Installation" inside "RAM Charger
Installation" then you must remove one level by dragging the
contents of the inner "RAM Charger Installation" into the
containing folder, then and trash the inner (now empty) "RAM
Charger Installation".
If this does not solve your problems, please contact
RAMCharger (at) RAMCharger.com.
|
![]()
![]()